Hikvision DS-KABD8003-RS1/S | Brackets | SS Steel

Hikvision DS-KABD8003-RS1/S | Brackets | SS Steel

Hikvision DS-KABD8003-RS1/S | Brackets | SS Steel

Category: Intercom
|
Brand: Hikvision
  • Intercom
  • Brackets
  • SS Steel

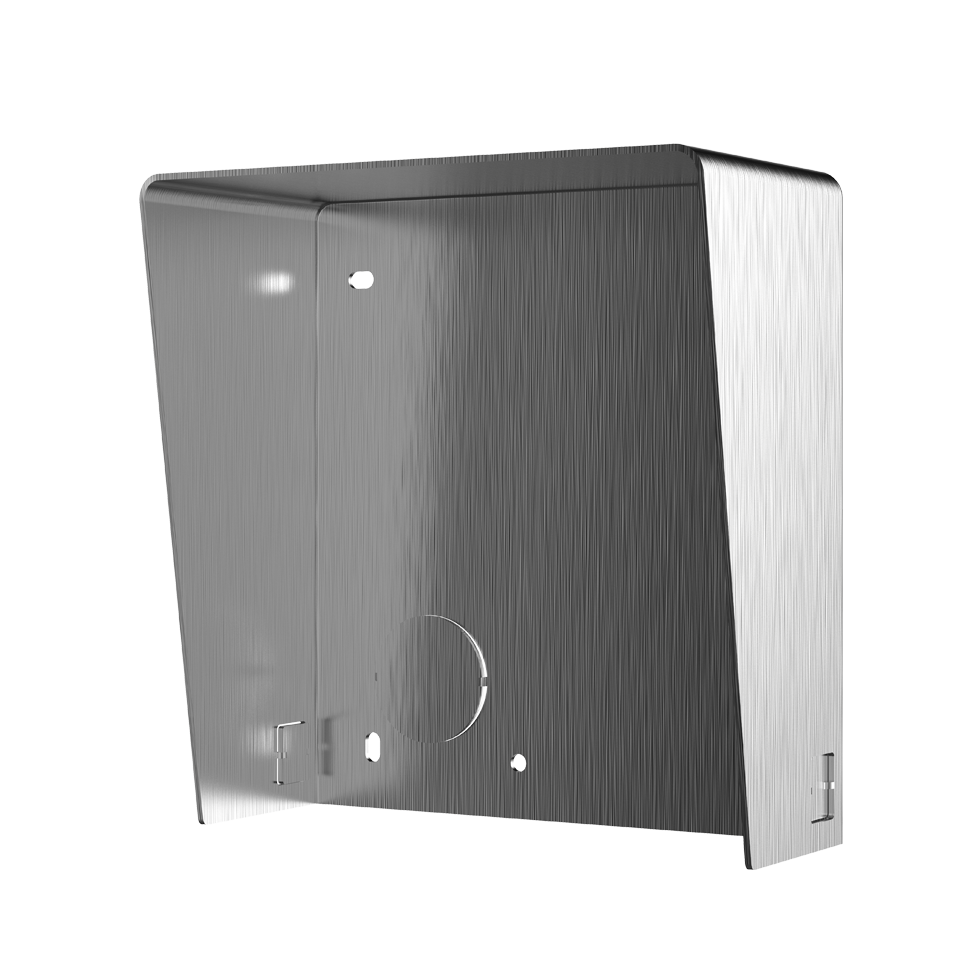
SECC,Convenient design available for the 1 module surface mounting of the modular door station DS-KD8003-IME1 or DS-KD8003-IME2

  • 40 years of Trust
  • Free Delivery
  • Free Returns
  • Expert Tech Support
View full details
Hikvision DS-KABD8003-RS1/S | Brackets | SS Steel

Specifications

  • Weight: DS-KABD8003-RS1 - 298.9gDS-KABD8003-RS2 - 500gDS-KABD8003-RS3 - 702.3g
  • Working temperature: -40° C to +60° C (-40° F to 140° F)
  • Working humidity: 10% to 95%
  • Dimension (W x H x D): DS-KABD8003-RS1 - 122 x 116.4 x 58 mm (4.80" x 4.58" x 2.28")DS-KABD8003-RS2 - 224 x 116.4 x 58 mm (8.82" x 4.58" x 2.28")DS-KABD8003-RS3 - 325.8 x 116.4 x 58 mm (12.83" x 4.58" x 2.28")
  • Installation: 1. Paste the installation Sticker 1 onto the wall. Make sure the sticker is placed leveled via measuring with the gradienter. Drill 4 holes align to the screw holes on the sticker.The suggested size of hole is 6 (diameter) x 25 (depth) mm.2. Remove the sticker and insert the expansion sleeves into the screw holes. Fix the mounting frame and protective shield onto the wall with 4 expansion bolts.3. Connect the cables to the corresponding interfaces of the main unit and insert it into the frame.4. Use the hexagon wrench in the package fix the cover onto the frame.
  • Material: SECC

General

  • Weight: DS-KABD8003-RS1 - 298.9gDS-KABD8003-RS2 - 500gDS-KABD8003-RS3 - 702.3g

Other

  • Working temperature: -40° C to +60° C (-40° F to 140° F)
  • Working humidity: 10% to 95%
  • Dimension (W x H x D): DS-KABD8003-RS1 - 122 x 116.4 x 58 mm (4.80" x 4.58" x 2.28")DS-KABD8003-RS2 - 224 x 116.4 x 58 mm (8.82" x 4.58" x 2.28")DS-KABD8003-RS3 - 325.8 x 116.4 x 58 mm (12.83" x 4.58" x 2.28")
  • Installation: 1. Paste the installation Sticker 1 onto the wall. Make sure the sticker is placed leveled via measuring with the gradienter. Drill 4 holes align to the screw holes on the sticker.The suggested size of hole is 6 (diameter) x 25 (depth) mm.2. Remove the sticker and insert the expansion sleeves into the screw holes. Fix the mounting frame and protective shield onto the wall with 4 expansion bolts.3. Connect the cables to the corresponding interfaces of the main unit and insert it into the frame.4. Use the hexagon wrench in the package fix the cover onto the frame.
  • Material: SECC

Resources

Access comprehensive documentation, installation guides, and the latest updates to get the most out of your device.

Need additional support? Visit our